Easy Way to Check Your Roof Insulation and Heat Loss

I was watching an episode of Holmes Inspection and Mike Holmes had a very easy and quick way to check on the insulation and heat loss in your roof in the winter.

Go outside the morning after a heavy snow fall. The snow fall has to be sufficient to leave snow on the roofs in your neighbourhood for this test to work. Have a look at the roofs in your area to see how much snow is on the roof.

If you see that you have had more snow melt off your roof than your neighbours then it is probably a safe bet that you have increased heat loss through your roof. This could be because of a lack of insulation, insufficient ventilation, or any other number of causes. Whatever the case, it is something that you should investigate if you want to increase the efficiency of your heating and decrease the amount of heat that you are loosing through your roof.

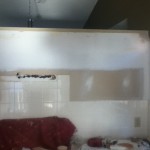
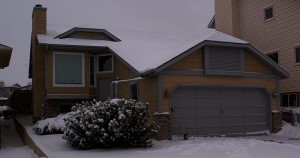
To view the snow depth on the above photo I had to turn up the contrast and turn down the brightness, thus making the image vary dark. Based on that photo from last winter I would say that I have minimal heat loss through the roof as I believe the only place that the snow is shallow on our roof was caused by the wind. Thankfully there appears to be no significant heat loss through the roof.

I’m going to have another look at this after our first significant snow fall this upcoming winter and will post the results and photos on this site. I will also put some photos of other houses where you can see the heat loss by the melted snow on their roofs so you can see what I’m talking about.
Installing a Vented Range Hood on Internal Half Wall

After a few years of putting up with a smelly house every time I cook we finally decided to install an exhausted range hood. As I wrote in our last post, the challenge is that the range hood is installed on in internal half wall.

I managed to get some help last weekend to get the range hood installed and it turned out really well, with a few surprises and unexpected twists like always.

My original plan was to simply take the doors off the cupboards and then use a 7″ hole saw to drill through the sides of the cupboards. Some of the challenges that we had are that we could not get a 7″ hole saw as no where that I could find actually rented them and I didn’t want to spend $70+ to buy one. Trying to use a jigsaw and a smaller hole saw didn’t work out too well.

Removing the Kitchen Cabinets

After the failed attempt to cut the holes with the cupboards on the wall we decided the best thing to do was to remove the cupboards from the wall. This proved to be a bit harder than expected as instead of the expected silicone between the tiles and the bottom of the cupboard it was grouted, which caused a bit more time and effort to remove cleanly.

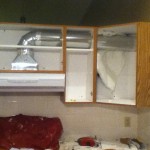
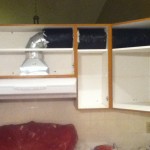
With the cupboards removed we were able to start the cuts in the sides and bottom of the cupboard with a smaller hole saw and then continue them with a jigsaw.

One thing that I was worried about when I started this project was putting a 7″ hole through the side of the house. I figured that with that size of a hole, and with my luck, I was sure to hit a stud in the wall. Fortunately though we were able to squeeze the pipe right beside a stud, without effecting the structure of the wall at all, which was great news.

Reinstalling the Cabinets and Running the Pipe

Once we got the hole cut in the exterior wall we re-installed the cupboards back into their original position. We then installed the new range hood and measured and cut the long length of pipe, installed the outside vent and then ran it through from the outside of the house. We used lots of silicone on the outside of the vent hood to create a tight seal and screwed the vent to the outside wall. The rest of the pipe and fittings all fit together nicely and we screwed and taped all the joins.

Insulating the Duct Work

Once that was done we spray foamed the exterior wall around the pipe and wrapped the pipe with duct insulation up to the 90 degree bend just above the range hood.

While insulating the duct work would have seemed quite absurd for our house in Australia, here in Canada it is quite a necessity. When the outside temperature drops to well below freezing you really need to everything possible to keep that cold air outside. The outside vent that we choose has a heavy baffle and there is a second baffle as part of the actual range hood.

At this point we flipped the switch on the breaker and tested out the new range hood, and boy does it suck! And by suck I mean pull a lot of air into the hood. The model of rangehood we got, NuTone Deluxe Allure® III, is rated at about 300 CFM on the “3” setting, and 430 CFM in boost mode, which is a lot…

At this point the range hood works, but it’s not too pretty yet, so the next step is to box in the duct work in the cabinets, which I will get to next time…

Exhausting a Range Hood Mounted on an Internal Half Wall

Our existing range hood is really quite useless. It is a recirculating range hood, with two-low power settings and a charcoal filter that doesn’t seem to actually filter anything, even when the filter is new. A minor complaint is that it is the old “almond” colour that our appliances used to be in the kitchen, before we started having to replace them.

It’s easy to understand why the builder put in a recirculating range hood. The oven is on an interior wall, which is actually only a half wall since our main living area has a cathedral ceiling. Venting the range hood out an exterior wall is going to be a challenge.

Despite the challenges we have decided to go ahead and vent a new kitchen range hood out the exterior wall. From our experience a recirculating range hood seems hardly worthwhile.

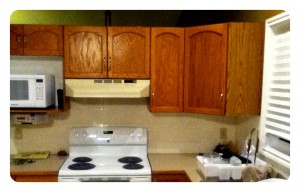
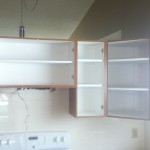
You can see some of the challenges that we need to overcome in the photo above:

  • Interior wall – no direct access to an outside wall
  • Half Wall / Cathedral Ceiling – no direct access to roof or attic
  • Cupboards only 2″ below top of wall – no room for overhead bulkheads

With all those challenges the only option is to go through the cupboards to the exterior wall. To do this we would loose the top 7″ or so of our cupboard storage space, which is pretty substantial. That said, I think that running the vent through the cupboards is probably the most viable option at this time…

Get a Free Home Energy Consultation – Ballarat and Adelaide

Low Energy Supplies and Services is still offering free home energy consultations to people around Ballarat, Victoria or in Adelaide, South Australia. With your free booking they will send a consultant to your house to work out what you need to do to increase your energy efficiency.

They will look at how you can save money in three different areas:

  • Power
  • Gas
  • Water

In addition to telling you how you can save money in those three areas they will also supply you with free energy-saving light bulbs and water-saving shower heads. They will also install them all for free.

The free consultations can be found here: