Calgary Black Garbage Bin Arrives

As I wrote in my previous article, Black Cart Garbage Collecting Starting Soon in Calgary, Calgary is finally moving to a more effective method of garbage collecting with the introduction of the black cart garbage collecting.

I’m wondering if this is going to change the behaviour of Calgarians when it comes to putting out their garbage? Although back in Australia we were not allowed any extra garbage beyond the cart, here in Calgary you can still have extra bags alongside your bin.

So, have you received your bin yet? Do you think it will change your garbage habits?

Black Cart Garbage Collecting Starting Soon in Calgary

Given that they have been using this service in Australia for decades I’m surprised it took so long to catch on here in Calgary. From our experience in Australia it’s a muchbetter way to collect garbage since it’s faster, more efficient and cleaner.

In Australia there was no provision made for extra garbage bags. To be honest I could see that as being quite a hindrance with the efficiency of the system, especially since they are moving to a one-person garbage truck, so the person picking up will have to be the drive.

There is no way in our yard for us to wheel the black bins into the yard or closer to the house, so it will be living in our back alley. We’ve had the blue recycling bins for a while and they’ve worked well. Occasionally after heavy winds though I have sometimes had to go searching for the bin near the end of alley.

You can read more about the City of Calgary Black Cart Garbage Collection here.

Cheap DIY Boom Mic Arm Stand

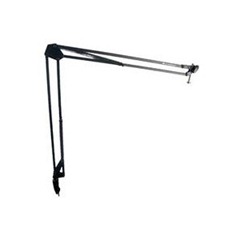
Heil Sound Table Top Microphone Boom ArmWhen I first purchased my microphone for recording the YWAM News Podcast I had looked briefly at getting a table top microphone boom arm like the one on the left. I think that they are a great idea, a big space saver on the desktop and also help to put the microphone at exactly the right location for recording the podcast.

The problem that I had with them, and the reason why I didn’t get one, was the price, which seems to sit between about $75.00 and $150 for a mic boom arm.

Hack an Ikea Tertial Lamp into a Mic Stand

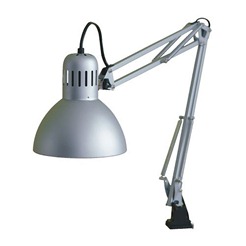
Ikea Tertial Work Lamp Silver ColourI decided to have a go at hacking an Ikea Tertial desk mounted lamp into a Mic Stand. The lamp only costs $9.99 and is mounted to the edge of a desk.

To change it onto a microphone boom I first tried to remove the light fixture so that I could use it later. Unfortunately though there was no way for me to remove the light fixture without cutting the cord, so I cut it right up near the actual fixture and then slowly pulled it out the base end of the arm.

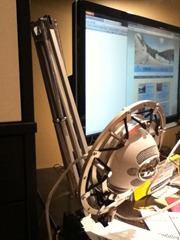
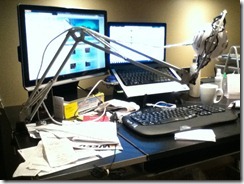
Ikea Mic Boom HackAfter removing the cord I removed the lamp head just by unscrewing it from the boom arm, making sure to keep the bolt, wing-nut and the plastic spacer. That left a lamp free arm for me to attempt to attach to my Blue Snowball and Ringer Shockmount.

To do that I unscrewed the shockmount from the table top base that came with the microphone. I had to file the plastic spacer down significantly for it to fit around the base of the shock mount. After trying to file down the plastic space for quite a while I ended up having to take a drill to it and really jam it into the end of the arm.

Ikea Microphone Boom HackThe bolt and nut from the lamp head fit in with new microphone and shockmount, so I just used them to attach the shock mount and boom arm together. Although it isn’t in the photos I used cable ties to attach the USB cable to the boom arm.

I’ve found a few other people online who have done this Ikea hack. Unfortunately the combination of the Blue Snowball with Shock Mount, and the boom arm from the Ikea Tertial boom arm weren’t quite as good a fit as I had hoped. As you can see from the photo the base of the shock mount actually hits the frame on the boom arm, so I can not tilt the microphone back past 90 degrees. This is a bit of pain since the boom arm doesn’t extend so it’s parallel to the desk, so the best I can do is about 70 degrees, which isn’t ideal for recording.

My mic combo is also very heavy. I’m finding that each time I extend the arm I have to tighten the other nuts and bolts in the arm with a screw driver so that it doesn’t fall to the desk. My next step will be to buy some heavy duty hardware from Home Depot to replace the stock nuts and bolts in the arm.

I’m also hoping to purchase a pop filter for the microphone to help improve my YWAM Podcast recordings. This will increase the weight of my mic combo even more, which will definitely make the upgraded hardware even more important.

The original lamp only cost $10 and the upgraded hardware should be less than $10. I figure that for $20 it’s a pretty good deal for a microphone boom arm, even if it isn’t the perfect solution.

Help Prospective Mothers in Papua New Guinea

The Mommyhood Memos Bloggers for Birth KitsSometimes it’s amazing how much you can help, through something so little…

In rural Papua New Guinea one in seven women die in childbirth! Yep, that’s right, 1 in 7 women die in childbirth! That’s a shocking statistic to say the least. To give birth to a child a mother has a 15% chance of dying, can you imagine?

A friend of mine, Adriel Booker, in Australia works with YWAM Ships, a ministry that is currently working on delivering medical help into Papua New Guinea. She is a Mom, blogger and fellow YWAMer who has a strong passion for helping other mothers in need. To help expectant mothers in Papua New Guinea she has started a program called Bloggers for Birth Kits to help reduce maternal mortality in rural Papua New Guinea.

The way to help is so simple that anyone can do it…

For as little as a $2.00 donation you can purchase a Birth Kit. The Birth Kit is very simple, but according to the Birthing Kit Foundation can greatly help to reduce the incidence of infant and maternal mortality and morbidity. The kit includes:

  • 1 plastic sheet to provide a clean birthing surface
  • 1 bar of soap for clean hands during the birthing process and to clean the umbilical stump
  • 1 pair of plastic gloves for clean hands
  • 1 sterile scalpel blade to cut the umbilical cord
  • 3 cords / pieces of strong string to tie the umbilical chord
  • 5 gauze squares to clean the baby and mother

The kit is simple, yet effective. Adriel made up her own (which you can watch on the video at the bottom of this post), but I think the most effective way for us to help is to donate.

If you do want to help with this great project, and for only $2.00 who wouldn’t want to help, you can read more about it at Bloggers for Birth Kits.

This post was originally posted on my personal blog at Help Prospective Mothers in Papua New Guinea – Bill Hutchison