Free Coupons for your Renovation Projects

This last week I have been chatting a bit with Ethan over at One Project Closer. I’ve been following their web-site since 2008, shortly after they started the site. The site is written by two different couples who own three houses between them and are kept busy with the upkeep and renovations on those sites.

While chatting with Ethan he reminded me about a few coupon pages that they have. The pages are for Home Depot, Lowes and Sears and they are regularly updated with the most recent coupons.

There are some pretty decent coupons on there including some 10% off coupons, free shipping or delivery coupons, and many more.

My only complaint is that the coupons are only for Home Depot, Lowes and Sears in the USA. We have Home Depot and Sears in Canada, but the coupons aren’t valid here. Lowes should be coming soon to Western Canada, which is exciting, and if I’m lucky some of the coupons for Lowes will work when they open.
How Wide Does A Door to a Furnace / Mechanical Room Need to Be?

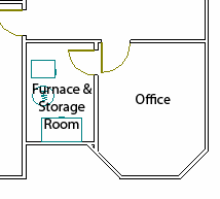
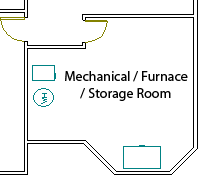
At the moment we have a rather large storage / mechanical / Furnace-and-Storage-Room-Current-Floorplanfurnace room in the basement of our house here in Calgary, Canada. The room has our furnace, hot water tank, freezer and a lot of shelves in it. It is easily large enough to be changed to a storage / furnace room and another room that could be used as an office or study (the window is too small for a bedroom).

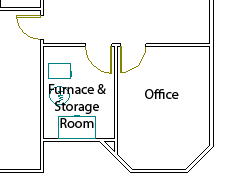
Furnace-and-Storage-Room-Option-2 One of the concerns about that room is the width of the door. A door to a mechanical / furnace room need to be large enough to fit the hot water tank and furnace out of it without any problems. Currently the door is 30”, or 76cm wide, which is technically too small to meet code for a furnace room. The door should be 32”, or 82cm wide to allow proper access.

Furnace-and-Storage-Room-Option-1To further complicate matters, if we were to put the door to the mechanical / furnace room in the newly created office space both the door to the office AND the door to the utility room would need to be the full 32” / 82cm wide since the hot water tank and furnace would need to go through both rooms.

It’s kind of funny / annoying that moving in here we were told and thought that to add another room in that area would be easy, but we are very quickly realising that nothing is every as easy as it looks.

Build a Wall Mounted Photo Shelf

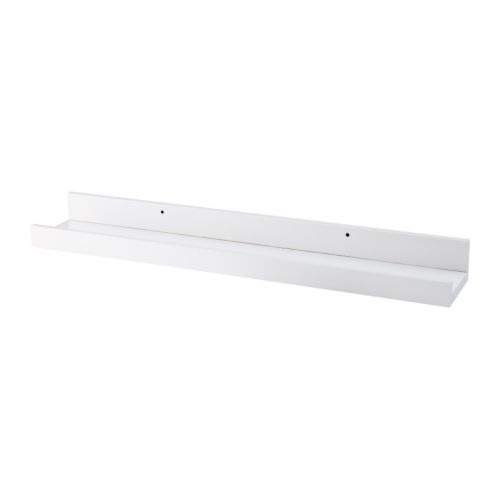
Ikea used to carry these great wall mounted picture shelves that you can attach straight on the wall. Your photo frames would sit in the shelf and lean back against the wall.

Ikea-Wall-Mounted-Photo-Shelf-White Unfortunately Ikea has discontinued the white photo shelf, so when I sent to pick one up for our daughter’s bedroom the only one left was 1.8 metres long. I purchased it, but when I got home I realized that cutting it down to the length that we wanted wasn’t a good option because of the foil and MDF construction.

With that option out of the picture we were left with the option to build our only picture shelf.

Design

The hardest part was settling on a design or style for the shelf. After looking around the web we decided to try to copy or duplicate that Ikea design.

SSPX0216

We decided on building the shelf 30”, or 76cm, long to sit above the end of our daughter’s bed. The shelf will actually be used for her books, rather than for photos.

Materials

The only materials that we needed for the wall mounted photo shelf were:

  • 1” x 4” x 8’ pine timber ($7.00)
  • 1” x 2” x 6’ pine timber ($3.50)
  • 1 1/2” wood screws for assembly
  • 2 1/2” wood screws for mounting
  • caulking (optional)
  • wood fill putty
  • primer and paint

The screws, paint, putty and caulking I had left over from our other projects, so all I had to buy was the timber for about $10.50.

Assembly

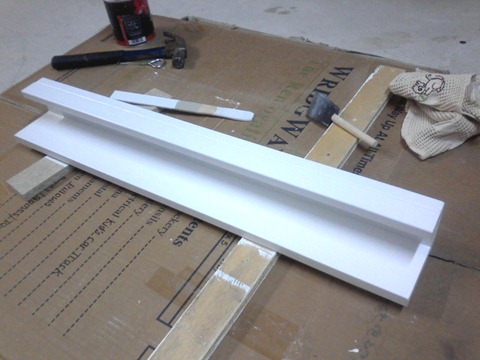
I cut the 1” x 4” into 2 x 30” long pieces and the 1” x 2” into a single 30” piece. You can change the length of the pieces depending on how long you want your shelf to be.

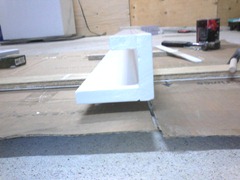
SSPX0217After cutting the timber put it together like the photo on the right. When you screw the boards together make sure to drill the pilot holes first to prevent the boards from cracking. Countersink the  screws slightly so that you can putty over the holes when you get to painting the photo shelf.

Painting

To get a smooth finish on the front of the shelf you can fill the front crack now with your caulking after giving the shelf a quick sanding. Then use the wood putty to cover up the screw heads that are under the shelf.

Once the putty is dry, sand it flat and five the whole shelf an undercoat with a good wood primer. After the undercoat is dry proceed to give the shelf two or three coats of paint. If you are using this shelf as a book shelf I would recommend using a hard wearing paint to help prevent scuffing and scratches.

Mounting

We have not yet mounted the new book shelf but when we do we will be attaching the shelf to the wall studs to make it extra sturdy. To do that we’ll find the studs with a stud finder, centre the shelf against our daughter’s bed and drill the pilot holes for the screws to mount the shelf. We’ll then use the 2.5” wood screws to screw through the self and into the studs.

To finish off the shelf we are looking at either getting white plugs to cover up the ends of the screws, or possibly painting over the screw heads. We aren’t sure yet which option we will be going with, but when we post the final photos of the shelf we’ll let you know.

Update – Here are the finished photos of the finished wall mounted picture and book shelf.

Links:

Save 10% on your Air Conditioning Cost

I was reading a recent edition of Popular Science and came across a way to use up to 10% less power on your window box air-conditioner.

To save up to 10% on the cost of running your window air-conditioner you should keep the air-conditioner out of direct sunlight. There are a few ways that you can do this:

  1. Install it on the side of the house that doesn’t get any sun
  2. Plant bushes or trees to shade the air-conditioner from the sun
  3. Build a shade for the air-conditioner

One thing that you need to be aware of when doing any of the three options above is to make sure that you don’t block the airflow around the air conditioner.