Stop Your Pocket Sliding Door from Scratching

Sliding Pockey Door Guides - Stop ScratchesWith most pocket sliding door that I have seen there are scratches on the inside and outside face of the door. These scratches are most often caused by the timber and other hardware that is inside the cavity that the pocket door actually slides into.

Our old upstairs bathroom door had this problem, and had some pretty unsightly scratches on the sliding door. Downstairs we have two pocket sliding doors, neither one of which I really desired to see scratched up as our old upstairs bathroom door was.

I found the solution at Bunnings in the sliding door hardware section for only about $4.50 per door.

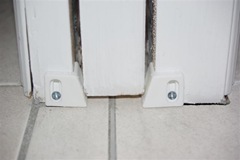
As you can see in the photo above (click on it for a larger view) I purchased some sliding door guides to install on the door frame. The guides are just two small pieces of plastic designed to fit onto the bottom of the door frame. I had to trim the door guides a bit to get the perfect fit, but now the door can’t rock into the timber and door hardware that is inside the frame that the pocket door slides into.

I always like it when a cheap and easy solution comes up to fix a problem. I just wish they were all this easy …
We Are (Finally) Moved Downstairs!

After a lot of time, painting and hard work we are finally moved downstairs!

The final stage for this you would have though would have been finishing the internal staircase, but we still had a lot of painting and preparation to do before we could finally move down into the four new bedrooms, including painting the new staircase.

The kids are now moved into their bedrooms and we are moved into our master "retreat", as Tamara calls it. The new master bedroom feels huge, and it is so nice to finally have a wardrobe / closet, as well as the ensuite.

I’ll post some photos soon of the kids bedrooms, our master bedroom and the ensuite…

Finishing Installing a New Driveway

After cutting out the driveway and laying down the roadbase the guys came back to pour the concrete.

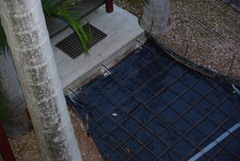
Steel Mesh Laid over Plastic Membrane Before they could pour the concrete they put down a black plastic membrane. From what I understand the plastic membrane is meant to provide a moisture barrier between the ground and the concrete. They did the same thing before they poured the slab for under our house.

To help attach the new driveway to the existing slab under the house and at the bottom of the stairs they drilled holes into them and rammed steel rebar into them. The embedded steel rebar helped to create anchor points for the new driveway.

Pouring the Concrete for the Driveway To lay the steel over the plastic membrane they put down dozens of small plastic cones. The plastic cones elevated the steel mesh about 75mm above the plastic. The steel mesh clicked into the plastic cones.

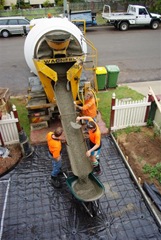
Once the steel was in place they poured the concrete into the formwork they had put around the outside of the new driveway. They used  wheelbarrows to cart the concrete down the side of the house. Trowels were used to then flatten out the concrete, give it the right shape and depth, and make sure that the fall on the garage is away from the house.

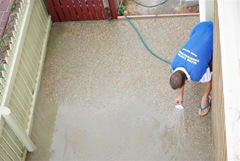
Revealing the Aggregate Pebbled Driveway After a few hours of drying time the crew came back to spray off the top layer of concrete . This revealed the pebbles on top to give the driveway  the pebblecreate / aggregated look.

A few days after they were finished I spent the morning painting and sealing the new driveway. The clear sealant that I used on the driveway should make it easier to wash off any drips from the car, and it gives the driveway a permanent "wet" look, which is very effective.

Preparing the Site for a Driveway

Before they could start putting in our new driveway they had to prepare the site.

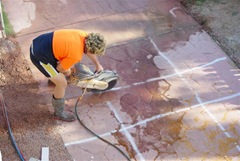
Cutting Through the Contrete on the Old Driveway The first step for this was to cut away the old driveway and remove it. Because of the height difference between the old driveway and the garage they only cut away the first half of the drive.

As you can see in the photo on the left they made followed a very systematic approach to cutting up the old concrete. They made pretty quick work of it too using the concrete saw.

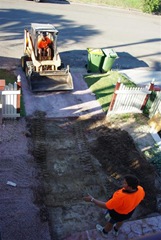
Removing the Old Driveway with a BobcatIt became clear why they were so precise with the cutting up of the driveway when the bobcat arrived the next day. It probably only took the bobcat about 15-minutes to remove the concrete driveway pieced and drop them into the skip that was delivered.

They then used the bobcat to flatten the area down a bit before dumping a few cubic metres of gravel roadbase / crackadust down and levelling it off. This will provide the base that the concrete will be poured onto when that gets delivered tomorrow.