Clothesline Finally Installed


The Hill’s Hoist “is one of Australia’s biggest success stories; a story which has become part of Australian folklore”. Which is a lot to say about a simple clothesline, but almost everyone in Australia will acknowledge that the Hill’s Hoist is an Australian Icon. (You can read the full story at The Hill’s Story.)

A few weekends ago I finally got around to installing our new clothesline in our backyard. The clothesline can actually be removed from the ground hole and the ground hole plugged. That way even though it is in the middle of the backyard we can just pull it out if we want to play sports in the yard. We’ve got 54m of clothesline, which will hopefully be enough for our growing family…
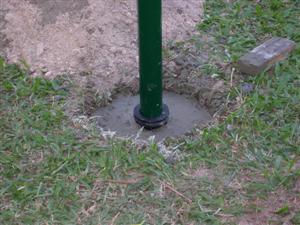
Nearly 40kg of Concrete used to cement in the clothesline

It took us nearly 40kg of concrete to actually fill the hole that I dug for the clothesline. This was a bit of a pain since I had only purchased 20kg and had to send out Matt (pictured below) to pick up more for me and the closest store was already closed.
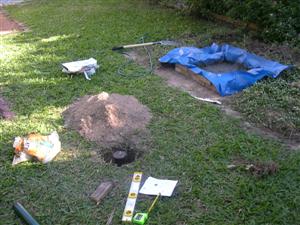
Cement mixing tarp, spirit level and general mess

To mix the cement I just purchased a $2.00 tarp and made a pool with some of our old bricks from the backyard. This was a lot easier than purchasing a wheel barrow. Since we haven’t enclosed under the house yet I don’t have anywhere to actually store a wheel barrow, but a tarp is pretty easy to store.
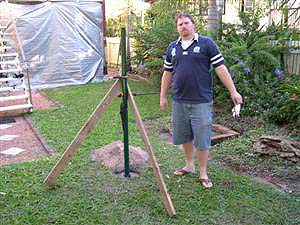
Installing the Clothesline with the hired help - Matt

The instructions for installing the clothes line actually call for using twine and pegging the clothesline so that it stays vertical. The guy I spoke to at Bunnings though recommended I use timber planks clamped onto the clothesline (as pictured above) and pegged into the ground. This was supposed to create a much more stable base for it, and it seemed to work.
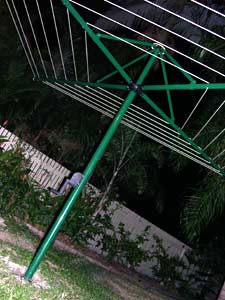
Installed Clothes line - the photo is crooked, not the clothesline...

Here is the installed clothesline. It actually is perfectly straight according to the spirit level, I was only trying to make the shot more “artistic”. (Did it work?)
Mystery of the Dead Grass – Solved…

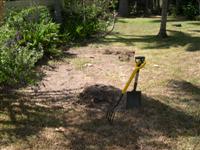
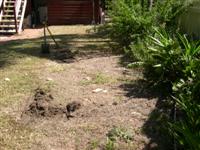
Just before the previous owners sold their house they put new turn / sod down in the back yard. We have been quite diligent in watering the lawn but this one patch just died, and no amount of watering helped. The patch seemed to have very square corners a fairly straight edges, so I thought that maybe that was where the put all the turn when they bought it and it had crushed the grass, or something like that. I even asked the neighbour and he couldn’t remember anything ever being there, and he couldn’t think of anything.

So last weekend we went out to purchase some grass seed and fertilizer. We found out that the kind of grass that we have, buffalo grass, can’t be planted with seeds, you need to get actual turf / sod and lay it because it’s a “creeping” grass, or something like that. All the places that sold turf were closed on the weekends so instead I purchased a pitch fork so that I could try aerating that part of the lawn and maybe apply some of the fertilizer that I already had. When I finally went to poke the holes in the ground I wound up and “twang“, I hit something very hard. I tried again somewhere else thinking that it was a rock and again, “twang“, the same thing happened.

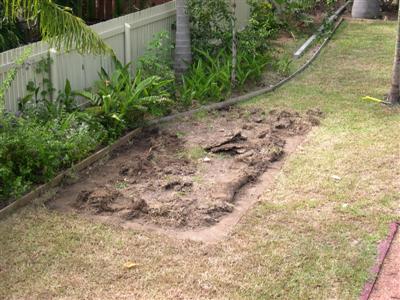
That’s when I started to poke around the turf more carefully and I discovered a pattern that you might recognize below:

Dead Patch of Grass 01 Dead Patch of Grass 02

So then I started to dig and scrape and poke around that part of the yard a bit more. And you know what I uncovered?

Dead Grass - The Reason? A Concrete Pad!

A concrete pad the perfect size for a garden shed!

We eventually want a garden shed, but definately not there near the middle of the back yard. We were thinking in the back left corner of the yard.

I guess that the previous owners just decided to stick the turf on top of it, either hoping that the grass would grow with just the soil attached to the roots, or just trying to hide it from the sucker buyers, namely me. So now I’ll have to break it up and haul it off to the dump, then I’ll have to purchase new soil and turn to stick down where this pad was. Bummer…

An Amazing Tree House

I must admit that I am very jealous of the tree house from this post, Pigeon Point Project: Vacation Series – Wrap Up. It’s the sort of thing that any kid would want.

I’m wanting to build a cubby house for our son in our back yard as I wrote in my post about our back yard, Our Back Yard. I want to put it in the back right corner in the photo in that post.

Here is an image of the plans that I grabbed from Mitre 10 of what I want to build for our son. It doesn’t really do it justice, but you can see the whole thing on their site:

Mitre 10 Timber Play Centre

You can check out the plans on the Mitre 10 site. You need to register with the site to view the plan, but it’s a pretty cool plan.

Our Back Yard

I am really looking forward to moving into our place and for our son to have a good back yard to play in.

Back Yard Panoramic

In our previous yard I have not been able to grow grass, so it’s nice to see a lot of grass already in this place. We’ve already cut the garden back a bit to give us a bit more grass for the kids, which I know goes against the common trend, but it’s what we have always wanted for our kids. This should be a good backyard for backyard kicked or kicks of the footy.

We are planning to build a cubby house in the back right corner of the yard and next to that we plan to have a good swingset. All these things we will look at putting in a bit down the track.